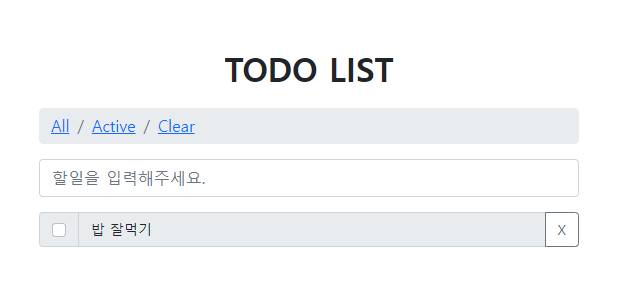
> 할일 목록을 만들면서 Vue3 배워보자 - 03
이번에는 Store를 통해 작업을 진행해보겠습니다.
기존에는 vuex를 사용해서 작업을 했었는데, vue3에서는 공식적으로 pinia 라이브러리를 사용하기를 권고하고 있습니다.
Pinia - Vuex를 대체할 새로운 Store!
사실 Pinia 는 Vue의 코어팀에서 활동하는 Eduardo 가
Vuex 5 의 RFC 에 따라 Vuex 5 의 구현체로 Pinia 를 작성한 것이다.
공식문서에 따르면 Vue 의 철학을 충실하게 따르면서 Pinia 를 개발중이며, 추후에 Pinia 와 Vuex 5 두 프로젝트를 하나로 합치거나 아주 쉽게 이동할 수 있도록 지원할 것이라 한다
- 출처: 사이트이동
Store 작업
npm i pinia
store/index.ts
파일 생성하고 아래와 같이 작성합니다.
import { createPinia } from "pinia";
const pinia = createPinia();

export default pinia;
main.ts
pinia를 등록해줍니다.
import { createApp } from "vue";
import App from "./App.vue";
import router from "./router";

import BootstrapVue3 from "bootstrap-vue-3";
import "bootstrap/dist/css/bootstrap.css";
import "bootstrap-vue-3/dist/bootstrap-vue-3.css";

import store from "@/store/index";

createApp(App).use(router).use(store).use(BootstrapVue3).mount("#app");
store/modules/todo.ts
파일 생성 후 뼈대를 작성합니다.
pinia는 vuex 처럼 따로 어딘가에 등록 할 필요가 없으며 mutatiaons이 없습니다.
actions에서 하거나 컴포넌트 내부에서 작업해도 간단합니다.
import { defineStore } from "pinia";

export const storeTodo = defineStore("todo", {
  state: () => ({}),
  getters: {},
  actions: {},
});
02편에서 작업했던 것들을 수정하면서 Store를 사용해보도록 하겠습니다.
App.vue
todoList를 Store의 state로 옮겨줍니다.
그리고 싹 지워줍니다.
(interface, props, handler, data등... )
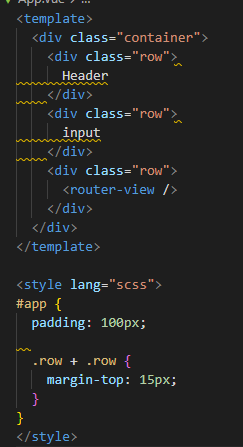
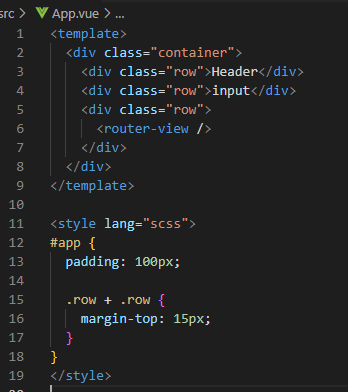
<template>
  <div class="container">
    <div class="row">
      <base-header />
    </div>
    <div class="row">
      <todo-input />
    </div>
    <div class="row">
      <router-view />
    </div>
  </div>
</template>
<script lang="ts" setup>
import BaseHeader from "@/components/header.vue";
import TodoInput from "@/components/todo-input.vue";
</script>
store/modules/todo.ts
App.vue에서 지웠던 todoList를 state에 등록하고
add, remove에 해당하는 이벤트 로직들을 actions에 등록합니다.
import { defineStore } from "pinia";
import { TodoItem } from "../index.interface";

export const useStoreTodo = defineStore("todo", {
  state: () => ({
    todoList: [
      {
        id: 0,
        title: "청소하기",
        status: "active",
      },
      {
        id: 1,
        title: "공과금 내기",
        status: "active",
      },
      {
        id: 2,
        title: "운동 30분하기",
        status: "clear",
      },
    ] as TodoItem[],
  }),
  getters: {},
  actions: {
    addTodoItem(item: TodoItem) {
      this.todoList.push(item);
    },
    removeTodoItem(id: number) {
      this.todoList.splice(id, 1);
    },
  },
});
store/index.interface.ts
여기저기 중복되고 있던 interface TodoItem을 모아줍니다.
다른 컴포넌트에서 사용하길 원한다면 import해서 사용하면됩니다.
export interface TodoItem {
  id: number;
  title: string;
  status: "active" | "clear";
}
views/item-list.vue
이제 interface파일에서 import해서 사용할 수 있게된 TodoItem interface는 지우고 store/index.interface에서 가져옵니다.
renderTodoList를 선언하여 ref로 감싸주어 해당 데이터의 변화를 감지하도록 합니다.
이때 Store에서 export하고 있는 인스턴스를 import해서 호출 한 뒤 바로 사용하면 됩니다.
<template>
  <todo-item
    v-for="item in renderTodoList"
    :key="item.id"
    :id="item.id"
    :title="item.title"
    :status="item.status"
  />
</template>
<script lang="ts">
export default {
  name: "ItemList",
};
</script>
<script lang="ts" setup>
import { ref } from "vue";
import { useStoreTodo } from "@/store/modules/todo";
import TodoItem from "@/components/todo-item.vue";

const store = useStoreTodo();
const renderTodoList = ref(store.todoList);
</script>
<style lang="scss"></style>
components/todo-item.vue
(props의 interfece도 TodoItem을 바로 사용하고 싶으나, 저는 문제가 발생하여 못했습니다.이 부분은 할 수 있으면 개선해야겠습니다.)actions의 함수도 바로 사용할 수 있습니다.
<template>
  <div class="input-group">
    <div class="input-group-text">
      <input
        class="form-check-input mt-0"
        type="checkbox"
        :checked="props.status === 'clear'"
      />
    </div>
    <input type="text" class="form-control" :value="props.title" disabled />
    <button
      class="btn btn-outline-secondary"
      type="button"
      @click="handleRemoveItem"
    >
      X
    </button>
  </div>
</template>
<script lang="ts">
export default {
  name: "TodoItem",
};
</script>
<script lang="ts" setup>
import { defineProps } from "vue";
import { useStoreTodo } from "@/store/modules/todo";
import { TodoItem } from "@/store/index.interface";

interface Props {
  id: TodoItem["id"];
  title: TodoItem["title"];
  status: TodoItem["status"];
}

const store = useStoreTodo();
const props = defineProps<Props>();

const handleRemoveItem = () => {
  store.removeTodoItem(props.id);
};
</script>
components/todo-input.vue
input도 마찬가지로 store를 사용하도록 합니다.
<template>
  <input
    type="text"
    class="form-control"
    placeholder="할일을 입력해주세요."
    :value="inputValue"
    @keyup.enter="handleAddItem"
  />
</template>
<script lang="ts">
export default {
  name: "TodoInput",
};
</script>
<script lang="ts" setup>
import { ref } from "vue";
import { useStoreTodo } from "@/store/modules/todo";

const store = useStoreTodo();
const inputValue = ref("");

const handleAddItem = (event: Event) => {
  const value = (event.target as HTMLInputElement).value;
  if (!value) return;
  inputValue.value = value;
  store.addTodoItem({
    id: 1,
    title: value,
    status: "active",
  });
  inputValue.value = "";
};
</script>
store/modules/todo.ts
이전에 구현하지 않았던 checked에 대한 로직도 추가하겠습니다.
Store에 actions를 추가해줍니다.
import { defineStore } from "pinia";
import { TodoItem } from "../index.interface";

export const useStoreTodo = defineStore("todo", {
  state: () => ({
    todoList: [
      {
        id: 0,
        title: "청소하기",
        status: "active",
      },
      {
        id: 1,
        title: "공과금 내기",
        status: "active",
      },
      {
        id: 2,
        title: "운동 30분하기",
        status: "clear",
      },
    ] as TodoItem[],
  }),
  getters: {},
  actions: {
    addTodoItem(item: TodoItem) {
      this.todoList.push(item);
    },
    removeTodoItem(id: number) {
      this.todoList.splice(id, 1);
    },
    changedStatus({
      id,
      status,
    }: {
      id: TodoItem["id"];
      status: TodoItem["status"];
    }) {
      this.todoList[id].status = status;
    },
  },
});
components/todo-item.vue
item의 체크를 할 경우, Store의 change 함수가 실행되어야 하므로 checkbox의 change이벤트에 핸들러를 바인딩해줍니다.
<template>
  <div class="input-group">
    <div class="input-group-text">
      <input
        class="form-check-input mt-0"
        type="checkbox"
        :checked="props.status === 'clear'"
        @change="handleChangeStatus"
      />
    </div>
    <input type="text" class="form-control" :value="props.title" disabled />
    <button
      class="btn btn-outline-secondary"
      type="button"
      @click="handleRemoveItem"
    >
      X
    </button>
  </div>
</template>
<script lang="ts">
export default {
  name: "TodoItem",
};
</script>
<script lang="ts" setup>
import { defineProps } from "vue";
import { useStoreTodo } from "@/store/modules/todo";
import { TodoItem } from "@/store/index.interface";

interface Props {
  id: TodoItem["id"];
  title: TodoItem["title"];
  status: TodoItem["status"];
}

const store = useStoreTodo();
const props = defineProps<Props>();

const handleRemoveItem = () => {
  store.removeTodoItem(props.id);
};
const handleChangeStatus = () => {
  const changeStatus = props.status === "active" ? "clear" : "active";
  store.changedStatus({
    id: props.id,
    status: changeStatus,
  });
};
</script>
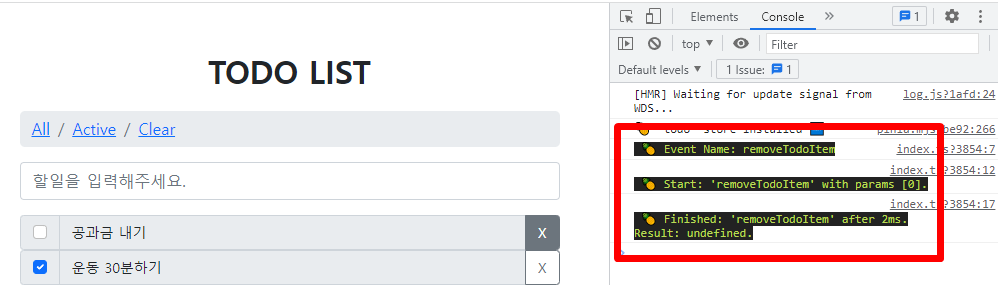
(별도) Pinia에서 작업이 호출될 때, 콘솔로 찍어서 확인해보기
store/index.ts
import { createPinia } from "pinia";
const pinia = createPinia();

pinia.use(({ store }) => {
  if (store) {
    store.$onAction(({ name, args, after, onError }) => {
      console.log(
        `%c 🍍 Event Name: ${name}`,
        "background: #222; color: #bada55"
      );
      const startTime = Date.now();
      console.log(
        `%c 🍍 Start: '${name}' with params [${args.join(", ")}].`,
        "background: #222; color: #bada55"
      );
      after((result) => {
        console.log(
          `%c 🍍 Finished: '${name}' after ${
            Date.now() - startTime
          }ms.\nResult: ${result}.`,
          "background: #222; color: #bada55"
        );
      });
      onError((error) => {
        console.log(
          `%c 🍍 Failed "${name}" after ${
            Date.now() - startTime
          }ms.\nError: ${error}.`,
          "background: red; color: white"
        );
      });
    });
  }
});

export default pinia;
귀여운 파인애플을 넣어서 작업해줍니다.
store 이벤트가 발생할때 콘솔에 로그를 남깁니다.
자 이렇게 하고나서 하나 더 해야겠죠???? 새로고침해도 데이터가 남아있을 수 있도록 localStorage에 데이터를 저장하는 작업을 하겠습니다.
localStorage에 데이터 저장하기
@vueuse/core 라이브러리 사용하여 어마어마하게 간단히 작업해보겠습니다.
설치
npm i @vueuse/core
store/modules/todo.ts
useStorage를 import해 온 뒤 저장하려는 state를 감싸줍니다.
useStorage('이름', 데이터);
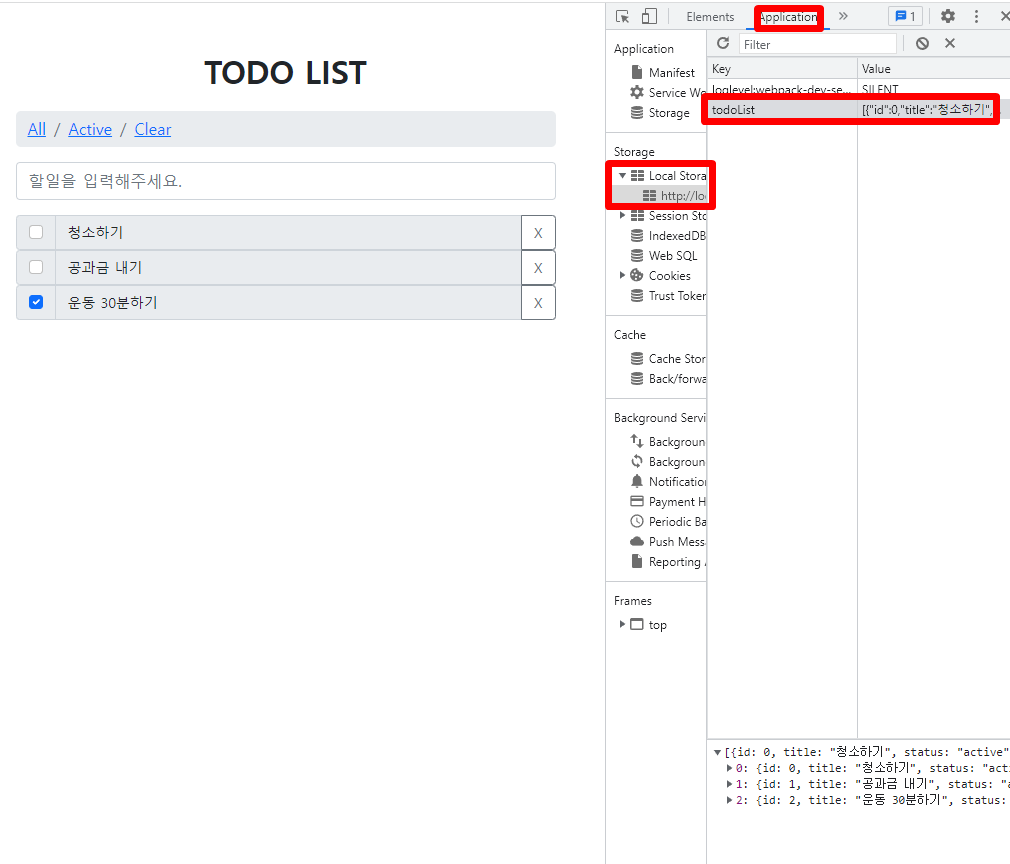
크롬 개발자도구를 통해 localStorage에 저장된 것을 확인합니다.
import { defineStore } from "pinia";
import { useStorage } from "@vueuse/core";
import { TodoItem } from "../index.interface";

export const useStoreTodo = defineStore("todo", {
  state: () => ({
    todoList: useStorage("todoList", [
      {
        id: 0,
        title: "청소하기",
        status: "active",
      },
      {
        id: 1,
        title: "공과금 내기",
        status: "active",
      },
      {
        id: 2,
        title: "운동 30분하기",
        status: "clear",
      },
    ] as TodoItem[]),
  }),
  getters: {},
  actions: {
    addTodoItem(item: TodoItem) {
      this.todoList.push(item);
    },
    removeTodoItem(id: number) {
      this.todoList.splice(id, 1);
    },
    changedStatus({
      id,
      status,
    }: {
      id: TodoItem["id"];
      status: TodoItem["status"];
    }) {
      this.todoList[id].status = status;
    },
  },
});
이제 더미로 넣었던 데이터를 비우고 정리 작업을 해줍니다.
그리고 remove에 splice시에 id를 index개념으로 하다보니 발생하는 버그도 해결하겠습니다.
store/modules/todo.ts
최초 데이터를 빈 배열로 바꿔줍니다.
그리고 removeTodoItem의 이벤트 내부 로직을 변경했습니다.
저는 for로 했으나 데이터가 크지 않기도 하고 직관적인 배열 메서드를 사용해도 좋습니다.
(이때, 기존 배열에서 수정하여 작업하고 있는데, 새로운 데이터를 담게 되면 오류가 발생하여서 이렇게 작업을 하였습니다. 이건 더 찾아봐야할 것 같습니다.)
import { defineStore } from "pinia";
import { useStorage } from "@vueuse/core";
import { TodoItem } from "../index.interface";

export const useStoreTodo = defineStore("todo", {
  state: () => ({
    todoList: useStorage("todoList", [] as TodoItem[]),
  }),
  getters: {},
  actions: {
    addTodoItem(item: TodoItem) {
      this.todoList.push(item);
    },
    removeTodoItem(id: number) {
      let index = null;
      for (let i = 0; this.todoList.length > i; i++) {
        const item = this.todoList[i];
        if (item.id === id) {
          console.log(item);
          index = i;
          break;
        }
      }

      if (index !== null) {
        this.todoList.splice(index, 1);
      }
    },
    changedStatus({
      id,
      status,
    }: {
      id: TodoItem["id"];
      status: TodoItem["status"];
    }) {
      this.todoList[id].status = status;
    },
  },
});
components/todo-input.vue
등록 시 id값도 마지막 데이터의 id를 찾아서 +1해줍니다.
<template>
  <input
    type="text"
    class="form-control"
    placeholder="할일을 입력해주세요."
    :value="inputValue"
    @keyup.enter="handleAddItem"
  />
</template>
<script lang="ts">
export default {
  name: "TodoInput",
};
</script>
<script lang="ts" setup>
import { ref } from "vue";
import { useStoreTodo } from "@/store/modules/todo";

const store = useStoreTodo();
const inputValue = ref("");

const handleAddItem = (event: Event) => {
  const value = (event.target as HTMLInputElement).value;
  if (!value) return;
  const length = store.todoList.length;
  const createdId = length === 0 ? 0 : store.todoList[length - 1].id + 1;

  inputValue.value = value;
  store.addTodoItem({
    id: createdId,
    title: value,
    status: "active",
  });
  inputValue.value = "";
};
</script>
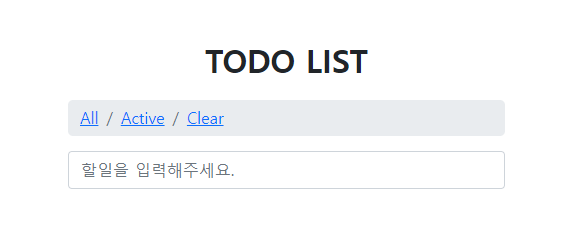
라우터를 통해 리스트 구분해서 보기( All / Active / Clear )
views/item-list.vue
useRoute를 통해서 다이나믹라우터의 status로 넘겨준 값을 사용하고,
watch를 통해 값이 변경되면 (header의 all, active, clear를 클릭 시) renderList의 값을 변경해 줍니다.
<template>
  <todo-item
    v-for="item in renderTodoList"
    :key="item.id"
    :id="item.id"
    :title="item.title"
    :status="item.status"
  />
</template>
<script lang="ts">
export default {
  name: "ItemList",
};
</script>
<script lang="ts" setup>
import { ref, watch } from "vue";
import { useRoute } from "vue-router";
import { useStoreTodo } from "@/store/modules/todo";
import TodoItem from "@/components/todo-item.vue";

const route = useRoute();
const store = useStoreTodo();
let renderTodoList = ref(store.todoList);

watch(
  () => route.params.status,
  (newVal) => {
    if (!newVal) {
      renderTodoList.value = store.todoList;
    } else if (newVal === "active" || newVal === "clear") {
      renderTodoList.value = [...store.todoList].filter((item: any) => {
        return item.status === newVal;
      });
    }
  },
  { deep: true }
);
</script>
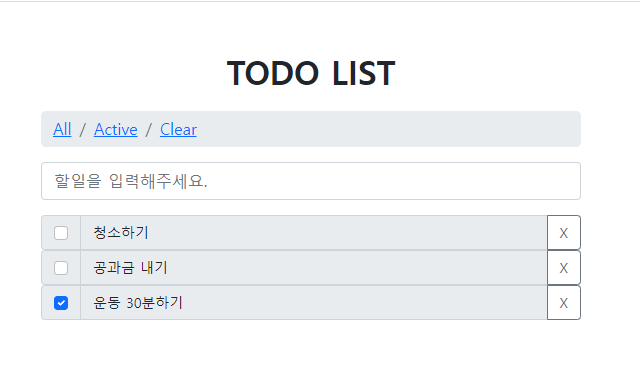
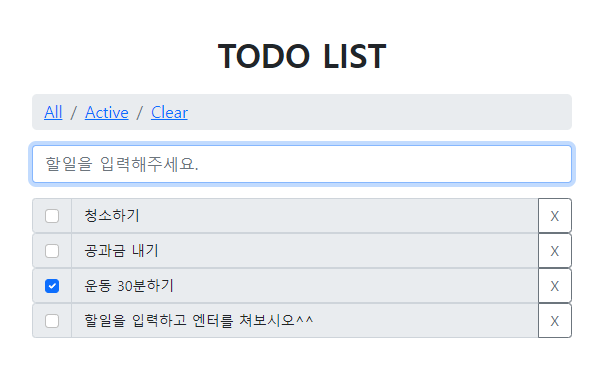
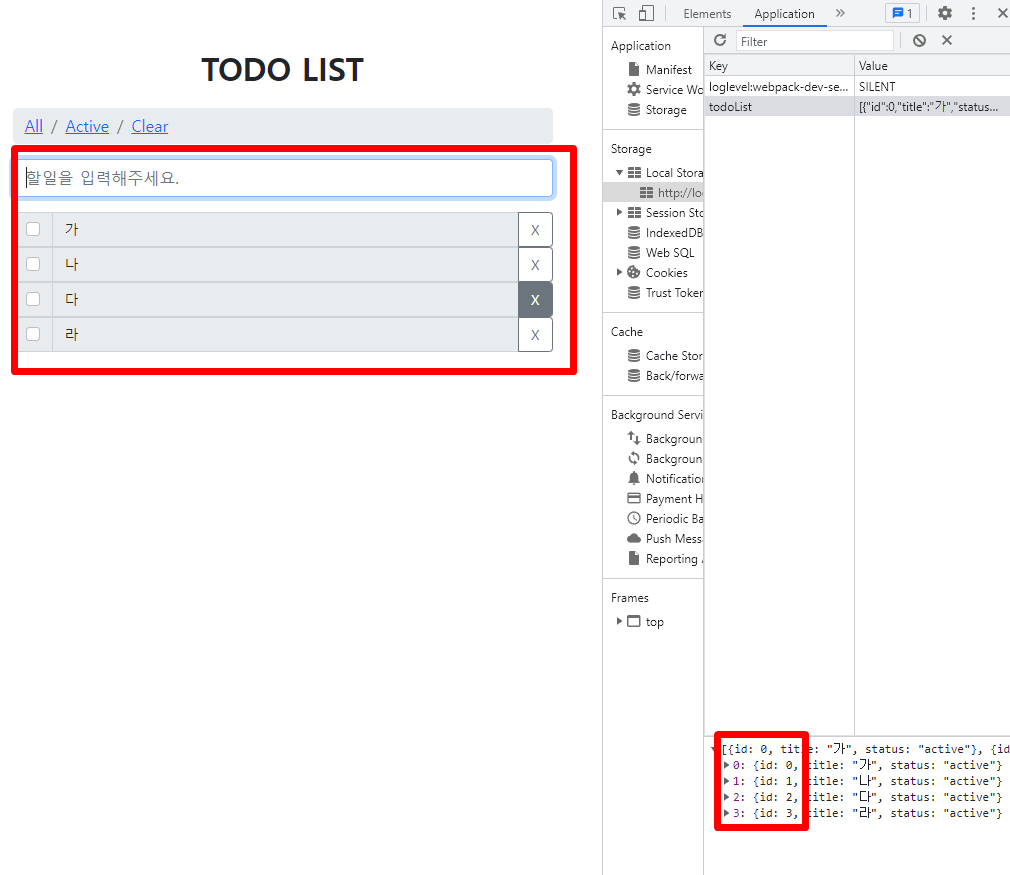
이제 아이템을 등록해보고, 체크박스를 체크한 후 header의 링크를 눌러서 변화를 확인합니다.
All일 경우
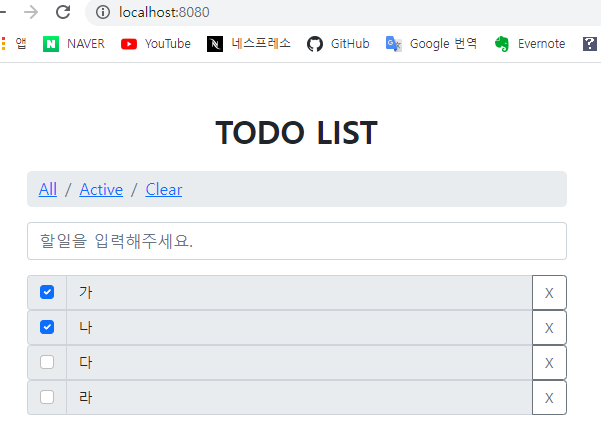
Active일 경우

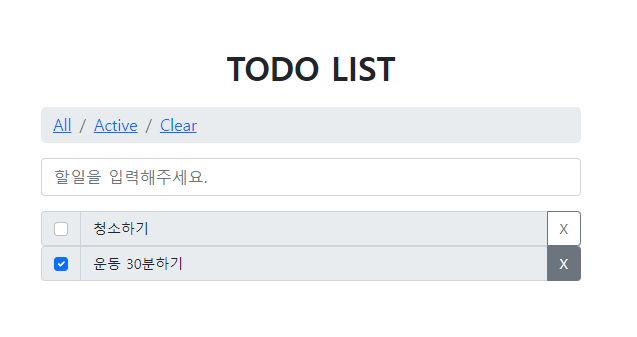
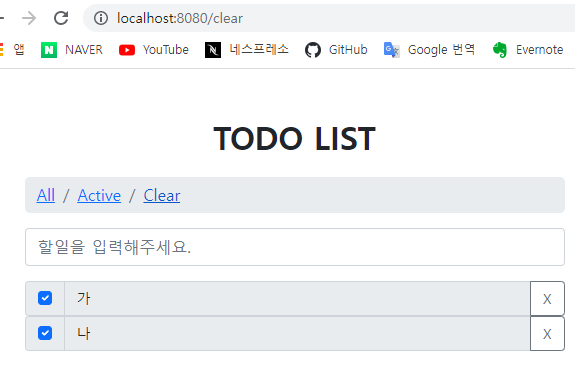
Clear일 경우
최종적으로 todo-list 만들기 작업을 완료하였습니다.
저는 vue3의 compositionAPI 방식보다 script-setup 방식이 문법이 더 간결해서 마음에 듭니다.
바뀐 부분이 많이 있으니 공식문서를 확인해보시길 추천합니다.
pacakge.json
{
  "name": "todo-list",
  "version": "0.1.0",
  "private": true,
  "scripts": {
    "serve": "vue-cli-service serve",
    "build": "vue-cli-service build",
    "lint": "vue-cli-service lint"
  },
  "dependencies": {
    "@popperjs/core": "^2.11.2",
    "@vueuse/core": "^7.7.1",
    "bootstrap": "^5.1.3",
    "bootstrap-vue-3": "^0.1.7",
    "core-js": "^3.6.5",
    "pinia": "^2.0.11",
    "vue": "^3.0.0",
    "vue-router": "^4.0.0-0"
  },
  "devDependencies": {
    "@typescript-eslint/eslint-plugin": "^4.18.0",
    "@typescript-eslint/parser": "^4.18.0",
    "@vue/cli-plugin-babel": "~4.5.15",
    "@vue/cli-plugin-eslint": "~4.5.15",
    "@vue/cli-plugin-router": "~4.5.15",
    "@vue/cli-plugin-typescript": "~4.5.15",
    "@vue/cli-service": "~4.5.15",
    "@vue/compiler-sfc": "^3.0.0",
    "@vue/eslint-config-prettier": "^6.0.0",
    "@vue/eslint-config-typescript": "^7.0.0",
    "eslint": "^6.7.2",
    "eslint-plugin-prettier": "^3.3.1",
    "eslint-plugin-vue": "^7.0.0",
    "node-sass": "^4.12.0",
    "prettier": "^2.2.1",
    "sass-loader": "^8.0.2",
    "typescript": "~4.1.5"
  }
}'~2022 > FE-Vue' 카테고리의 다른 글
| [Vue3/Typescript] 할일 목록을 만들면서 Vue3 배워보자 - 02 (0) | 2022.03.06 |
|---|---|
| [Vue3/Typescript] 할일 목록을 만들면서 Vue3 배워보자 - 01 (0) | 2022.03.06 |
| [Nuxtjs 프로젝트] stylelint 설정(.stylelintrc.js) (0) | 2022.02.12 |
| (force-update) gnb 같은 페이지에서 새로고침 비슷하게 reload 시키기 (0) | 2022.02.07 |
| Nuxt Universal Mode? (넉스트 유니버설 모드) (0) | 2021.08.23 |
| [기초] Vuex 사용하기 (0) | 2021.06.17 |
| vue.js로 개발 후 firebase로 배포해보기 (0) | 2019.11.15 |
| vue.js 기초- 인스타그램 만들어보기 09_vueX (코딩애플 세미나 후기) (0) | 2019.08.01 |